HOW TO Migrate Metadata From Cumulus to Canto
April 18, 2018 •Antra Silova

Written by Jack Huang
This article will guide you through the process of migrating metadata from Cumulus to Canto. There are three parts to the process:
- Exporting metadata from Cumulus
- Formatting the metadata file from Cumulus
- Importing metadata to Canto
Exporting metadata from Cumulus
To export the metadata from Cumulus you will need to use Cumulus Desktop Client.
Once you open the Catalog in Cumulus Desktop Client, select the file you want to export out metadata. In this example, we will select all asset records to be exported.
Once the assets records are selected, click on File -> Export -> Selected Records… as indicated in Screenshot 1 below.
Screenshot 1: Export menu
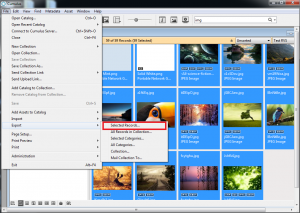
After ‘Selected Records…’ is clicked, an export window will pop up. Select ‘Cumulus 5-7 format (UTF-8)’ and choose the location you like to export.
Screenshot 2: Export Window
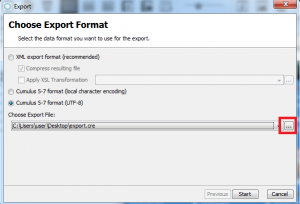
Click ‘Start’, once the export is completed, it will create a [filename].cre format file. Then user will need to change the file to ***.txt format.
Figure 3: Changing file format
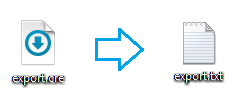
You have now completed the export process.
Formatting the metadata file
The purpose of this process is to ensure the metadata file is readable for Canto.
Open an empty Excel document, Select Data -> From Text/CSV.
Figure 1: Open file in Excel
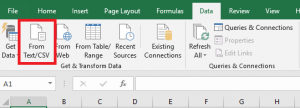
After the file is opened, Excel will show a preview window like below.
Figure 2: preview window
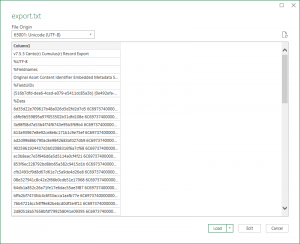
Make sure you select File Origin as ‘65001: Unicode (UTF-8)’.
Figure 3: File Origin

Then Click on Edit, you will see all data are list within a single Column.
Figure 4: Initial data
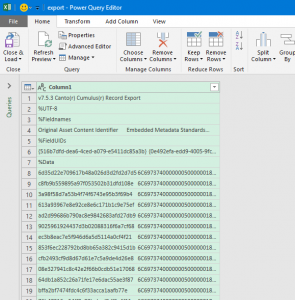
Select ‘Split Column by Delimiter’ Option.
Figure 5: Select Split

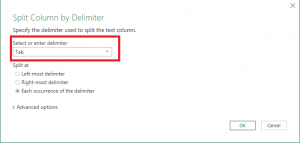
Select Tab as delimiter.
Figure 6: Select Tab
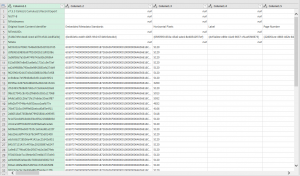
The data has now been divided into multiple columns.
Figure 7: Multiple Columns
Next step is to clean up rows 1-7 except row 4 by clicking ‘Remove Rows’.
Figure 8: Click Remove Rows

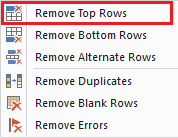
You need to remove the top three rows by selecting ‘Remove Top Rows’, then enter 3 in the appearing input box.
Figure 9: Selecting remove Top Rows
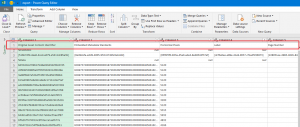
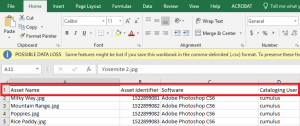
Once this is completed, you will see all the metadata field name appear in the row 1.
Figure 10: Removed top 3 rows
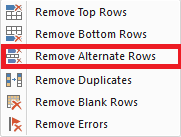
Next step: remove rows 2-4 by selecting ‘Remove Alternate Rows’.
Figure 11: Remove Alternate Rows option
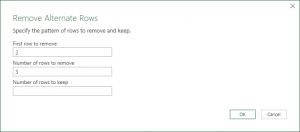
In the appearing window below, enter 2 for ‘First row to remove’, enter 3 for number of rows to remove. Enter Number of rows to keep is depending on how much rows you have minus 3.
Figure 12: Remove Alternate Rows window
As shown in below (Figure 13) is displayed on the screen, row 1 is the metadata field name came from Cumulus, each remaining row represent one asset records in the Cumulus Catalog with the metadata in each column.
Figure 13: Cleaned data table
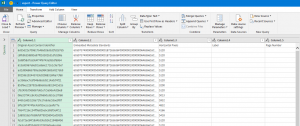
Go through each column, delete any column that you don’t like to import to Canto. Make sure column ‘Asset name’ is in the first column of the table, as this going to be the file name that Canto is looking at when these are imported.
Figure 14: Asset Name column is the first column

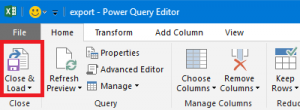
After selecting the columns that you like to import to Canto, Click on ‘Close & Load’ button.
Figure 15: Close & Load button
The following table will open in Excel mode, delete the first row which has “ColumnXXX”. Your metadata field will now become first row, then save this file as “.csv” format (comma delimiter) file.
Figure 16: Deleting first row of current table
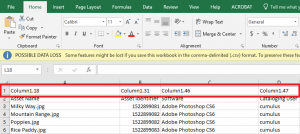
Figure 17: New Metadata field row
You are now ready to import this metadata to Canto using Canto Metadata Importer.
Importing metadata to Canto
To import Cumulus metadata to Canto, you are required to get these two items ready:
- TEXT type Custom Fields created in Canto
- Metadata importer is enabled
These functions are only accessible to Canto admin users.
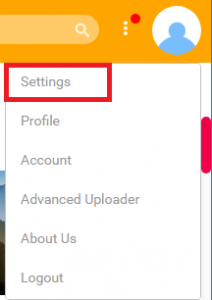
If you are logging in as Canto admin user, you can access Canto settings by hover your mouse cursor in the avatar icon, in the appearing menu, click on Settings.
Figure 1: Accessing Canto settings
Go to ‘Configuration Options’, then select ‘Custom Fields’. Copy the metadata field name from the csv file that was created in previous process “Formatting Metadata file” into “Field Name” input box, type in any description to this metadata field, select ‘TEXT’ field type, click on ‘Add’ once finished. In this example, it is using “Asset Identifier” which is the second column from the csv file.
Figure 2: Adding Custom Fields

Go to ‘Links & Connections’, then select ‘Metadata Import’. Click ‘Select’ to browse the csv file then click on upload.
Figure 3: Upload csv
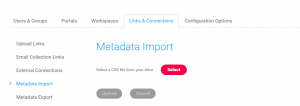
Figure 4: Import csv
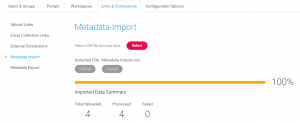
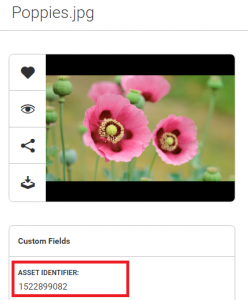
When all files are processed, go back to Canto home page by clicking the logo, select the files that were just imported for metadata. The metadata has been assigned to the image.
Figure 5: Result
You have completed the metadata import process.


